Sudelia Ruins at 100% in The Legend of Zelda: Echoes of Wisdom
The Ruins of Sudelia is the first dungeon in the story of The Legend of Zelda: Echoes of Wisdom, accessible during the quest The Mystery of the Breaches. In this guide, we will detail how to complete the dungeon 100%, overcoming its various puzzles, rooms, bosses, and more without leaving any secrets or chests behind.
How to Complete the Ruins of Sudelia Dungeon
In the first room of this dungeon, you will encounter a locked door and a button to press on the other side of a huge rock. Approach the rock and examine it so that Tri explains that you can use the scepter to bind to environmental elements and enemies.
To do this, you need to use the X button. Bind to the rock, and you will be able to move it mimicking your own movements. Push it towards the hole in the room, then release the binding to let it fall into the void. This will allow you to press the button and open the door.
In the next room, first, climb the slope at the back and cross with copies of beds to another room containing a half-buried chest on the floor. Bind to the chest and push it backward to fully extract it. Open it to obtain 5 luminous butter.
Return to the previous room where there is another huge rock. Move it to the left with the binding to find a hidden staircase. Go down it to a room with cobwebs hanging from the ceiling. You can use them like vines to climb.
Pass by the first spider and soon you will see a second one on the ground. Defeat it and memorize it with the scepter. It’s a Hunging Spider, and with it, you can create copies to climb its threads to elevated areas. Use replicas to reach the chestdungeon map, and then exit through the ladder on the right.
In the next room, use beds to ascend and advance until you reach a long hallway with an elevator (in the opposite direction of the elevator is a flame Zol enemy; make sure to memorize it if you haven’t yet). Once you ascend the elevator, at the top of the next stairs, you will face the Ferrus enemy. Defeat it, then turn left to find other stairs leading down to a 2D room.
In this room, there are four torches, but two of them are unlit. The first one you see below can be ignited with a replica of a flame Zol. Next, place a bed next to the heavy rock to cross to the right (don’t push the rock, jump over it) and climb to the space where a pile of wooden boxes is next to the second unlit torch. Throw another flame Zol at the boxes to set them on fire, which will eventually ignite the torch.
Once all four torches are lit, a door will open for you to continue. Now you have a new teleportation point and another closed door flanked by four statues. The first on the right has a golden shield. Launch Tri with the binding towards the shield and pull it back to make it fall and open the door.
Cross to the other side and go first to your left. If you navigate some rocks by creating objects, you can reach a chest containing 50 rupees. In any case, now you can only advance to a higher path, where a mini-boss battle awaits you.
Indeed, the mini-boss is an evil version of Link. To defeat him, follow these steps:
- When Link raises his shield, throw binding to catch his shield and pull it back to disarm him.
- Once he has no shield, create copies of enemies to attack Link (a very good choice is Peahat).
This is the strategy to defeat him, although you will need to watch out for his attacks and dodge. Remember that you can use the rocks in the environment to hide behind and try to confuse him.
After defeating him, Link will drop the Sword of Power, which can now be yours. This means you can activate the swordmaster mode to attack with the sword and shield as if you were Link. However, this mode is temporary as it consumes energium, represented by the blue bar beneath your hearts.
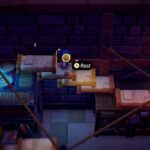
Use the sword to cut through the barrier ahead and descend the stairs to a section with a 2D camera. Here, to the right, you will see a treasure chest on a side. You can reach it by first placing two copies of bushes and a table in the same position as shown in our image:
Then climb to the upper ledge and drop down to the bushes to reach the chest, which contains the Heart Fork accessory. After collecting it, return to the lower area and move the large rock with binding to the left. Continue through the staircase to the right. You will end up in a hallway where there is a locked door on your right, and at the end is the closed door of the final boss. For now, you can only go through the open door on the left.
Here you will enter a room that automatically closes, where there are up to three Deku Babas. The first can be easily defeated. The second is behind a barrier that you need to break with the sword. The third is on a platform that you can reach with copies of objects.
Once you have defeated them, go first through the door on the left. This leads to a room with bars behind which there is a chest and a green statue. Grab the statue with binding while positioned in front of it and then climb the slope on the left to elevate the statue. Push it towards the ledge behind it, then take it to the button on the right to press it and make the bars disappear. The chest contains 50 rupees.
Now go through the other door you opened after defeating the Deku Babas. This leads to a room with another Deku Baba behind a panel. Use the binding to pull it back so it falls into the void. Doing so will reveal a hidden chest containing a Small Key.
Return to your previous steps and open the closed door with the key. You will enter a room with four statues, but one of them is “out of place” (on the other side of the bars). Grab it with binding and move it so that you can place it on top of its floor plate.
After opening the bars, descend the stairs to a 2D room. Step onto the moving platform to cross to the right, where you will learn a new skill related to binding. From now on, when binding to environmental elements, you can hold R to mimic the movements of objects (and also enemies).
Try it out now. Aim upwards to bind to the moving platform above and mimic its movements to “float” to the right thanks to it and bypass the gap. Normally climb onto the platform, cross to the left, and get onto another platform that has another platform above it. Repeat the previous action: bind to this and mimic its movement to go to the right.
Next, continue ascending, and you will see a chest to the right that you can reach by binding to the last platform in the room. Inside it contains 20 rupees. Finally, exit this room to reach a chamber where you will see the big chest containing the key to the final boss of the dungeon.
On the other side of the bars, there is a raised button and a statue. To activate the button, start by creating a copy of a table on the other side of the bars. Then move the table using binding so that it is next to the button’s support. After that, bind to the statue and bring it to the table. Jump with Zelda so that the statue also jumps. This way, you can make it reach the table and then the button.
Once the bars disappear, collect the large key. Now all that is left is to return to the boss door through the shortcut that has opened to complete the dungeon.
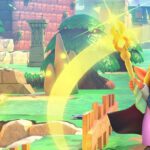
Boss Battle Against Sismorok
The boss Sismorok is a large stone golem-like enemy. At the start of the fight, you will notice a purple sphere at the bottom of its body. What you need to do is throw binding at this ball as soon as possible to grab it and then quickly pull back.
If done correctly, the boss will fade away, leaving only the ball on the ground. Activate the sword and hit the ball repeatedly until Sismorok regains its form.
On the second occasion, the ball will change position and now be on his right shoulder. However, the mechanic remains the same. Be prepared to dodge one of his powerful attacks, where he strikes the ground with both hands. Right after the strike, he will remain still for a brief moment. Take the opportunity to grab the ball with binding and repeat the pattern of hitting it with your sword.
We are almost there. On the third occasion, Sismorok will regain his form, but this time the ball will be on top of his head and he will be more aggressive, performing spinning attacks with his hands that cover a large area. Wait for him to perform his attack with both hands on the ground. As before, he will be still for a moment afterward.
Pull the ball with binding (or, if you have spare energium, activate sword mode and strike the ball to remove it faster). Keep hitting the ball after removing it from his head, and you should finish the battle without any issues.
After the battle, before returning to the outside, Tri will gain one more point of power to create replicas, and you will also receive 5 power pieces. Additionally, you can collect a new heart container, so don’t forget about it.
Related posts:
 Zelda Echoes of Wisdom Suthorn Ruins Dungeon walkthrough
 Zelda Echoes of Wisdom Jabul Ruins Dungeon walkthrough
 How many hours is The Legend of Zelda Echoes of Wisdom?
 Frequently Asked Questions in The Legend of Zelda: Echoes of Wisdom
 The mystery of the breaches in The Legend of Zelda: Echoes of Wisdom
 Escape from Hyrule Castle in The Legend of Zelda: Echoes of Wisdom
 Best Echoes to get early in Zelda Echoes of Wisdom
 All Echoes locations and abilities in Zelda Echoes of Wisdom listed
 ALL echoes (replicas) in Zelda: Echoes of Wisdom and how to get them
 Zelda Echoes of Wisdom Elusive Tumbleweeds walkthrough
 All Smoothie and Potion recipes in Zelda Echoes of Wisdom
 How to beat Mogryph in Zelda Echoes of Wisdom


Post Comment