Hyrule Castle at 100% in The Legend of Zelda: Echoes of Wisdom
The Hyrule Castle, located in the Hyrule Citadel, is one of the key dungeons in The Legend of Zelda: Echoes of Wisdom. This dungeon is mandatory to access during the quest titled Unknown Location. In this guide, we will explore how to complete the dungeon 100%, solving various puzzles, navigating rooms, defeating bosses, and uncovering every secret and treasure.
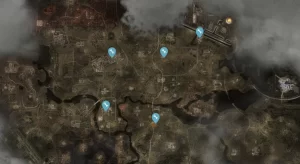
How to Complete Hyrule Castle
At the start of the dungeon, you will encounter a Ferrus Level 2 in the first hallway of the castle. If you have energium, don’t hesitate to take him down using the sword technique. Proceed through the back door to reach the throne room. Once there, grab the throne chair and move it aside to reveal a hidden passage underneath.
This will lead you to the first room of Basement 1. Pull the wall in the middle of the path to get through. As you enter a corridor filled with furniture and dark guards on patrol, you might notice this area seems quite familiar. Indeed, it’s the same setting where your first mission in the game took place, when you had to escape from the castle prison.
The goal here is to avoid being seen by the guards; if they spot you, they will capture you and send you to a room where you must defeat several enemies to return to your last checkpoint.
Fortunately, it’s relatively easy to stay unnoticed. We recommend using a trampoline to jump onto the furniture and then create old beds to traverse from one piece of furniture to another without touching the ground. Staying elevated will keep you out of sight from the guards below.
Additionally, you can throw boxes or pots to create distractions, drawing the guards away from their patrol routes. This technique will be essential as you continue through the dungeon, allowing you to navigate to the right and reach the cell area.
Once there, use trampolines to jump over the broken wall and access the cell where you were originally imprisoned. Keep going down the stairs.
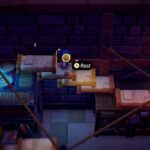
You will enter a 2D section where doors close behind you, and three Ferrus enemies will confront you. Defeat them to proceed through the door that opens, and as you descend the stairs, don’t forget to check the map for the location of three treasure chests in this room. The leftmost chest contains a monster stone, while the two chests together offer 3 spiral pumpkins and 5 floral nectar vials.
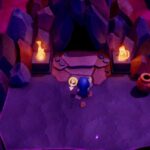
Now you’ll arrive at the first room of Basement 2. In this room, there are four extinguished torches waiting to be lit. The first torch, which is behind a panel, can be ignited using the ability to create replicas from a distance. Select a flaming Zol and hold Y while aiming at the torch. Jump and release the button to send the Zol flying and ignite the pedestal.
Next, move to the right, climb the stairs, and light the torch at the top. Launch another flaming Zol at the left torch. Finally, go back down and in the lower right corner, throw a flaming Zol across the panel. Then, link to it and carry it “floating” to the remaining torch.
Once you cross through the newly opened door, you’ll find yourself in a room with a new type of monster called the expelling orb. These enemies create powerful air currents every few seconds. You can grab the first one using your linking ability and carry it toward the right passage to defeat it with your sword. Remember to memorize its position with the staff.
Continue on, eliminate the second orb by throwing it into the void, and when you reach the third, prepare to jump over it just as it releases its air current. This will allow you to float upward with the current.
Proceed to where the three flaming Zols are located and enter the right door to a room filled with sand. Place an expelling orb in the center to clear away all the mounds quickly. You will discover a chest that you can pull out from the sand to obtain the dungeon map.
Exit the room and head north to cross the chasm and enter a dining room where the boss door is locked. At this point, you have two possible paths to take. Let’s first explore the left door. In the room with flowing water, go down the stairs to find an underwater cave that is dark.
This cave is essentially a maze, so it’s advisable to open your map and locate the two treasure chests in the area.
Swim through the passages toward the chest in the center, which contains 20 rupees, and dive to the bottom left corner to find another chest with 100 rupees. Once you’ve collected them, swim toward the exit in the upper left corner.
This leads to a room with dark guards who must not see you. Approach the first patrolling guard and when he’s not looking, circle around the wall from behind. Walk through here to get to the center of the room, positioning yourself behind the wall with blue tiles and two torches. In this spot, no guard can see you.
Create a bed to climb up the wall and then pile several beds and a trampoline as shown in the image to reach the button atop the pillar. Press it to reveal a chest containing a small key. After that, you can return to the previous dining room.
Now, let’s explore the right door that we previously ignored. You will enter a room filled with sand, heavy stones, and scorpions. Defeat the enemies, and then don’t forget to break the cracked wall with a bomb fish to access a small secret nook containing a chest with rupees. After this, use the small key you obtained earlier on the door to the south.
Descend into a 2D room with expelling orbs. Progress until you come across one situated above two climbable rock walls. Stack several beds as illustrated, so you can jump on the air current from the orb to cross to the other side and ascend toward the exit.
You will be trapped in a room with a couple of Ferrus and a Guard with a flail. Defeat them, then go through the upper door into a room containing the big key chest, along with two additional chests (one with a golden egg and another with the Frog Ring upgrade).
Now that you’ve secured the big key, you can return to the boss door for your confrontation. Be prepared, as this battle can be quite challenging.
Combat Against the Boss Ganon
This fight against Ganon resembles the prologue battle (when you temporarily controlled Link). In the first phase, Ganon will attack by lunging forward with his weapon. During this moment, he will remain briefly immobilized, allowing you to strike him with your monster replicas or using the sword technique.
After inflicting some damage, he will transition to his second phase. At this stage, you must dodge his attacks and wait for him to launch his spinning weapon. When this happens, he will again become stationary for a moment, giving you the chance to attack him with your sword.
Repeat this process while collecting energium from the fiery bats he sends your way. Remember, when he launches the bats, you can create a replica of a shield moblin to absorb their impact, making it easier to dodge and gather energium.
After enough damage, Ganon will become enraged and will eventually throw an energy ball at you while shouting. Be ready to strike the ball back with your sword, keeping your guard up as he will return it just like a tennis match, but at increasing speeds.
Return the ball each time until it finally hits him, stunning him for a few seconds. Rush to his position and unleash your attacks before he can resume his offensive pattern. As you damage him further, he will become even more furious, mixing all the attacks he has showcased so far, including launching another energy ball at you.
Sharpen your reflexes and return the ball as before, repeating this tactic until the combat reaches its conclusion. Upon defeating him, Tri will level up in power, and from now on, some replicas will cost less to create. You will also receive 5 power pieces and, as always, you can collect a new heart container before exiting to the outside world.
Related posts:
 Escape from Hyrule Castle in The Legend of Zelda: Echoes of Wisdom
 How to escape Hyrule Castle in Zelda Echoes of Wisdom
 Hyrule Castle Dungeon walkthrough in Zelda Echoes of Wisdom
 Sudelia Ruins at 100% in The Legend of Zelda: Echoes of Wisdom
 Gerudo Crypt at 100% in The Legend of Zelda: Echoes of Wisdom
 Jabul Ruins at 100% in The Legend of Zelda: Echoes of Wisdom
 Temple of Eldin at 100% in The Legend of Zelda: Echoes of Wisdom
 Frequently Asked Questions in The Legend of Zelda: Echoes of Wisdom
 The mystery of the breaches in The Legend of Zelda: Echoes of Wisdom
 Chaos in Zora Bay in The Legend of Zelda: Echoes of Wisdom
 The rock quarry in The Legend of Zelda: Echoes of Wisdom
 The volcano breach in The Legend of Zelda: Echoes of Wisdom


Post Comment