How to solve the code to the safe in the Director’s Office in Silent Hill 2 Remake
If you want to make a quick exit from Brookhaven Hospital in the Silent Hill 2 Remake, you’ll need to navigate through the building, collecting key items to solve various puzzles. As is typical in the Silent Hill series, this guide will assist you with the challenges you face, especially in unlocking the safe located in the Director’s Office.
Solving the Book Puzzle in Silent Hill 2 Remake
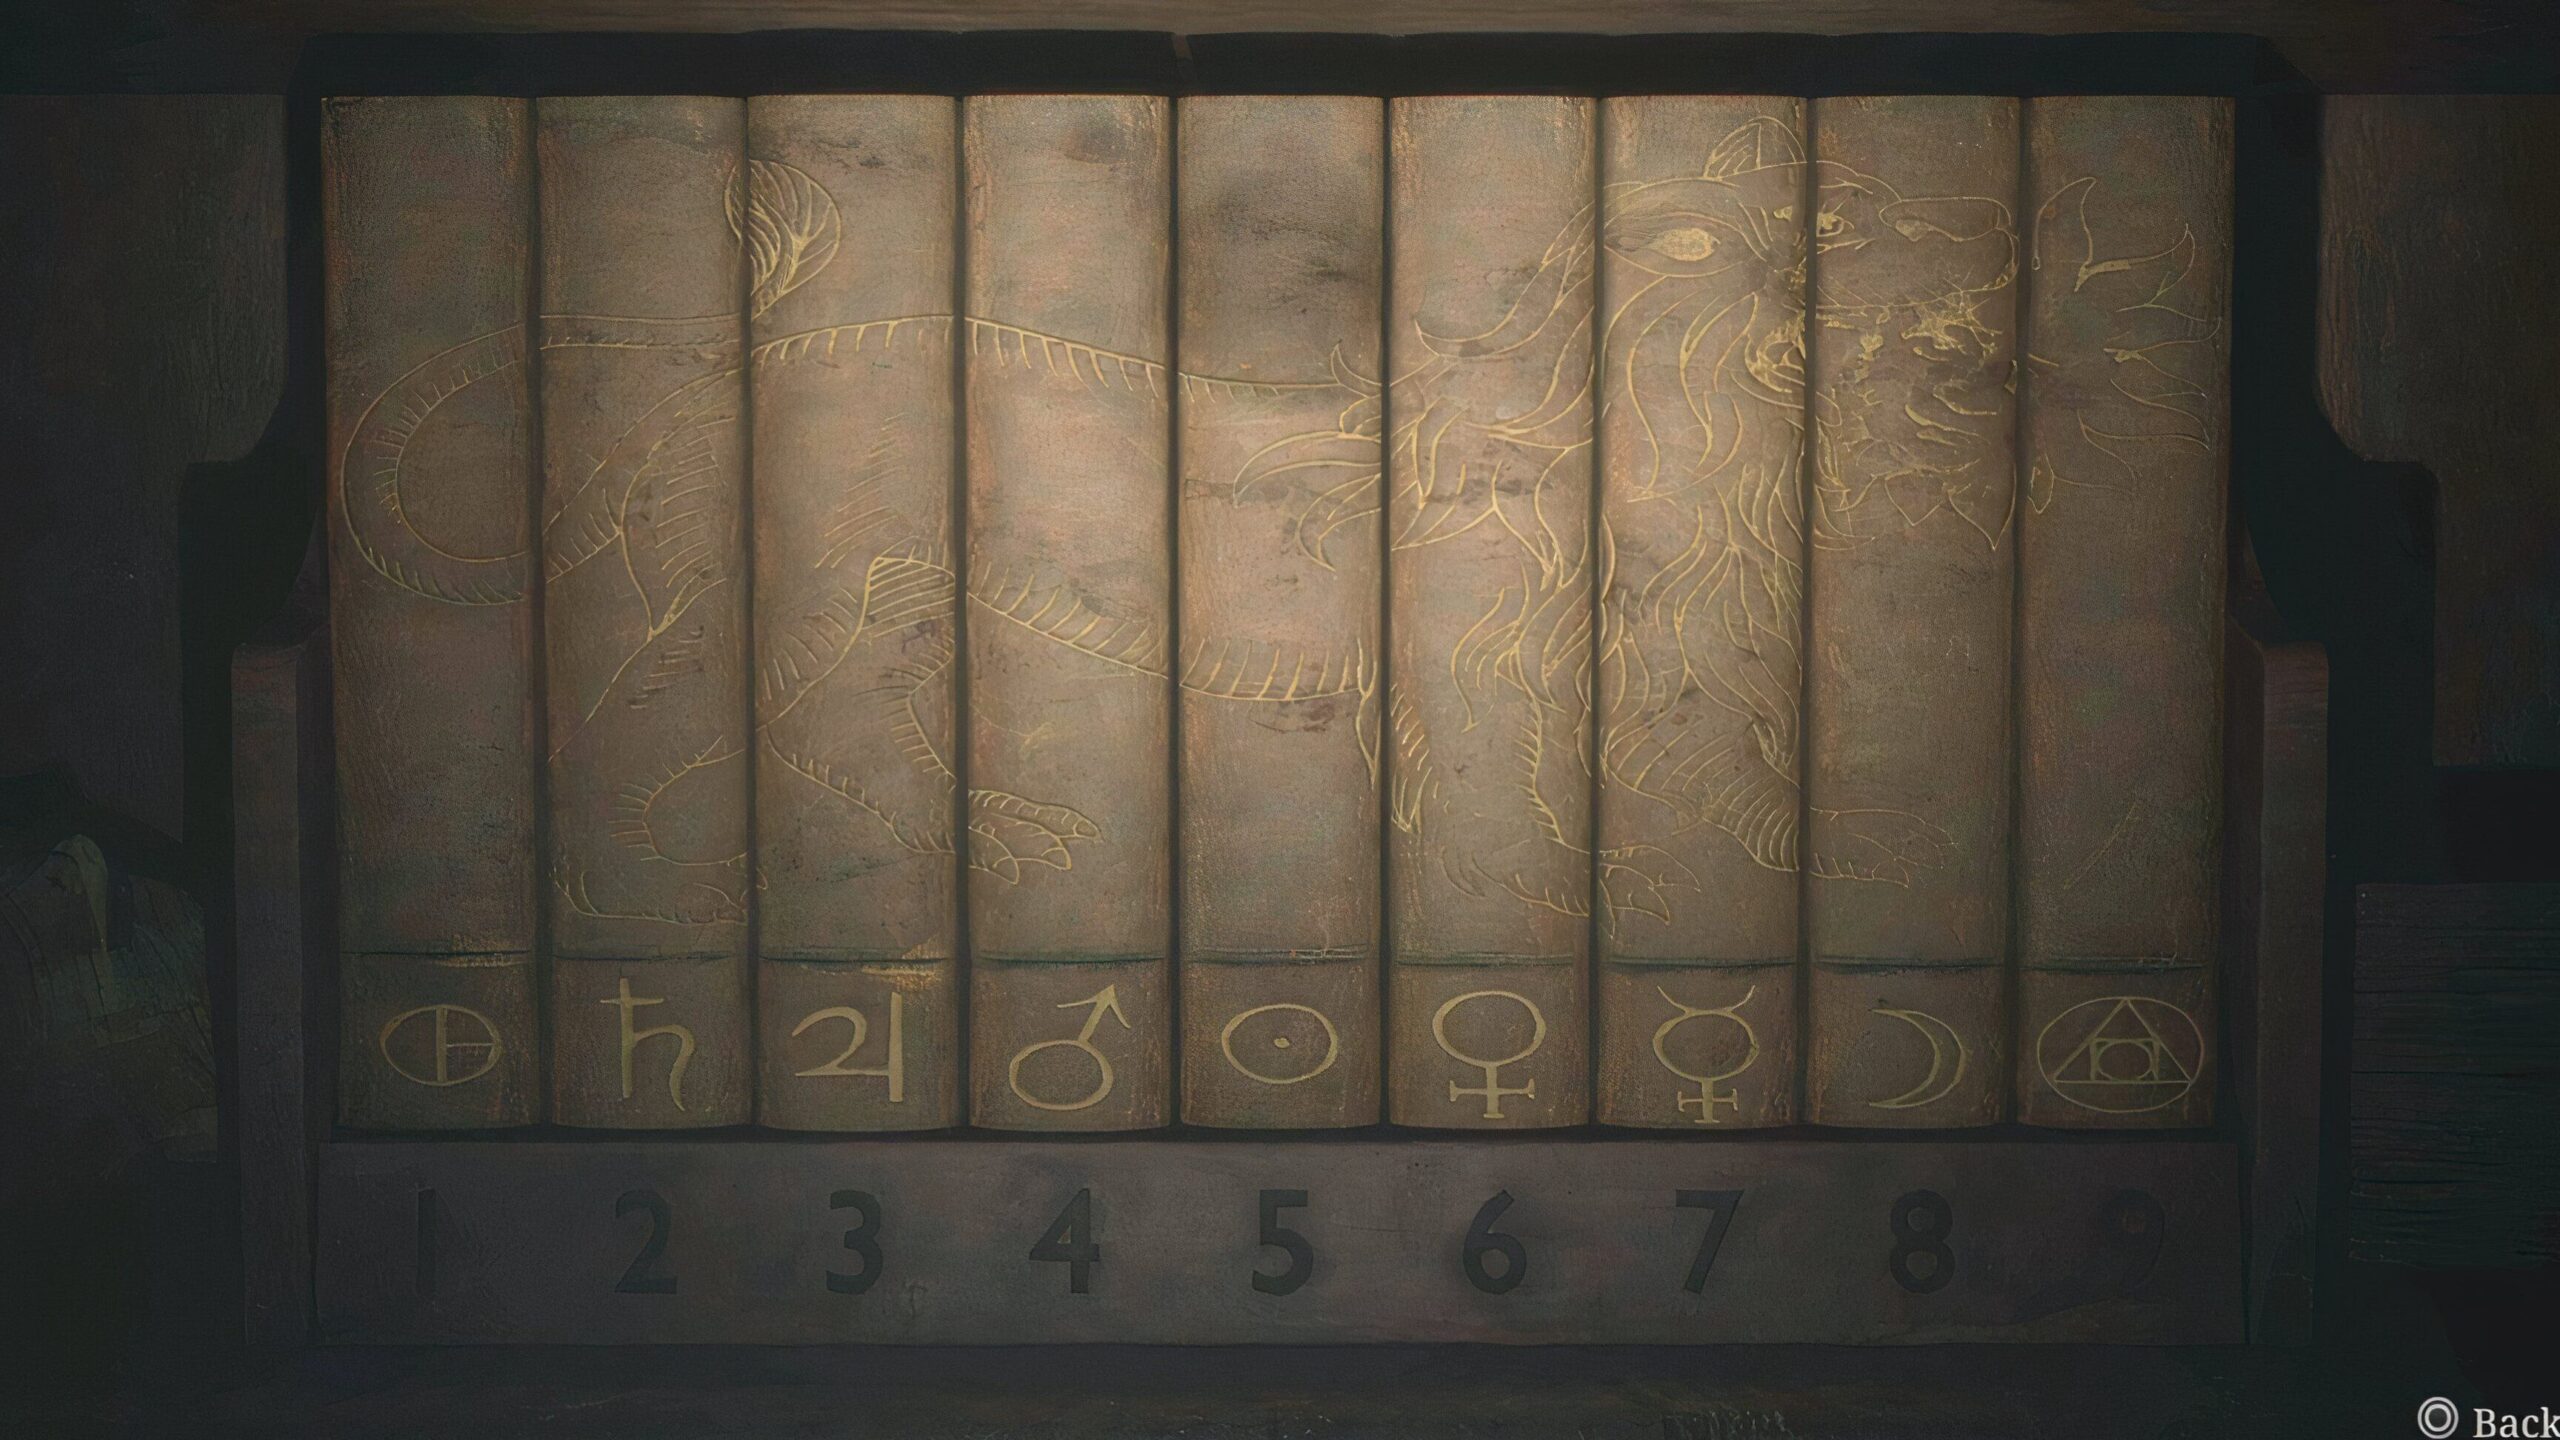
Before you can access the safe, you’ll first need to tackle the book puzzle to get your hands on the key for the locked door in the Director’s Office. Upon your initial entry, you’ll find a missing piece for the safe and encounter a relatively simple puzzle.
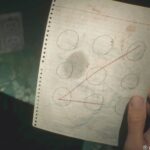
Your objective is to examine the illustrations in the books and rearrange them to resemble the shape of a lion, as shown in the accompanying image. Once you accomplish this, be sure to either jot down or take a picture of the numbers that correspond to the symbols in the puzzle.
Accessing the Safe in the Director’s Office
After inserting the missing piece into the safe and completing the book puzzle, it’s time to unlock the safe itself. This part can be somewhat confusing since there are no additional hints regarding the code, which may leave you pondering for a while.
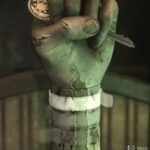
To unlock the safe, you’ll need to refer to the code provided by the bracelets from the hand puzzle. The code consists of three two-digit numbers that correspond perfectly to what you see on the safe. Thus, the combination for the safe in the Director’s Office is 95-45-71, derived from the symbols in the lion puzzle. Once you unlock it, you will find the rooftop key inside, which is crucial for your escape from the initial section of Brookhaven Hospital.
Related posts:
 How to solve the code to the safe in room 206 in Silent Hill 2 Remake
 How to solve the code to the safe in room 206 in Silent Hill 2 Remake
 How to solve the Jacks Motel safe code in Silent Hill 2 Remake
 Safe in the director’s office and solution in Silent Hill 2 Remake
 How to solve the lock code for the Brookhaven Hospital reception room in Silent Hill 2 Remake
 How to solve the Nursing Station code in Silent Hill 2 Remake
 Hand from the director’s office and solution in Silent Hill 2 Remake
 Room 206 safe and solution in Silent Hill 2 Remake
 Jack’s Motel safe and solution in Silent Hill 2 Remake
 Break Room Safe and Solution in Silent Hill 2 Remake
 How to solve the Jukebox puzzle in Silent Hill 2 Remake
 How to solve the clock puzzle in Silent Hill 2 Remake and get all the hands


Post Comment