Friendships in 100% hidden places in Dragon Age: The Veilguard
Friendships in Hidden Places marks the tenth mission in the Dragon Age: The Veilguard storyline. This mission becomes available after you complete both The Case of the Smuggled Relic and Sea of Blood. To proceed with the narrative, it’s essential to finish these quests. This guide will provide you with tips to navigate the mission successfully, including crucial information on collectibles, side quests, and narrative choices.
Before you begin, it’s vital to note that you should avoid speaking with Neve (the mission marker) at first. Instead, visit the Guard in the workshop to deliver any memories you’ve collected, helping you level up and acquire better loot.
If you’ve been following this guide, reaching level 4 should be straightforward.
Now, proceed to talk to Lucanis, who will have a time-limited dialogue prompt. During your conversation, you will face a Decision:
- Everyone should help.
- Make yourself comfortable – This is the option we selected.
- How did they catch you? – This option provides additional context without concluding the conversation.
- Do you think it’s okay to work here? – This option also offers more context without wrapping up the chat.
As you engage with Lucanis, more dialogue options will surface, allowing for deeper understanding of the situation:
- I admire your courage – This is the option we chose.
- The important thing is that you got out of there.
- What angers Rencor?
- Are you dangerous?
- I thought only mages could be possessed – This option adds context without concluding the conversation.
Next, it’s time to complete a couple of side quests that should have appeared:
- Finish A Slow Poison.
- During this mission, we will open the Door of Deep Sorrows in the Crossroads, where numerous chests await, including one with a Singular level weapon that will enhance your strength.
Upon returning to the lighthouse, you should notice an icon above Lucanis, indicating that your relationship with him has improved, which will trigger his first companion mission, Café with the Crows. After completing it, we will embark on a small adventure to uncover hidden treasures, taking Lucanis and Neve along for the journey, starting from the Forest of Arlathan. Ensure that you have activated the fast travel beacon; if not, don’t worry—you can still reach the location without issues.
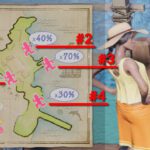
Begin by heading to the north. Ignore the chest displayed on the minimap; it’s unreachable. Further along, you’ll find a slope to the right with statues of wolves and a cave. For now, bypass this and climb the ledges to the north until you reach a zip line, as indicated on the map below.
Once you land, grab the crystal and eliminate the barrier. Cross over and head south across the bridge to place the crystal on a base, restoring the artifact of the magical ray. Aim it to the left, towards the platform containing the chest. There’s a base where you can charge it with the ray, restoring the bridge to access the chest that contains Agile Exploration Leather Armor.
Now, let’s return to the cave to the right of the zip line that we previously ignored. Traverse through this area; you will encounter enemies, collect items, and find a closed door. Unfortunately, you’ll need to return to the starting point and head west towards the owl statue located at the indicated spot below.
If you haven’t interacted with any of these statues yet, approach and wait until you can interact with the slab to trigger an event. In this instance, a magical mine will appear behind the statue. Activate it to blow up the wall and access a chest containing Challenging Silence, a helmet.
Let’s wrap up our exploration of this area by resolving a previously pending issue. If you head to the platform below, located in the western part of the region, you should find a energy crystal in a base that activates the bridge (the one on the right of a barrier, which has another energy base to the left where a magical ray strikes). Take it with you.
Ride the zip line, then climb the ladder and turn left into the gallery. Here, you can place the crystal on one side from where the artifact of the ray is visible, causing a bridge to appear. We could have accomplished this earlier. Poor optimization, Captain Obvious has had enough of this.
When you aim the ray to the right, towards where you came from, you can direct it against a hanging energy base from a floating platform, activating another magical ray.
Return to the gallery, grab the crystal and place it on the opposite side, near the second magical ray. This will deploy a platform that blocks the first ray; don’t worry. Ascend, lower a plank to create a bridge, and now you can remove the crystal to reactivate the ray. Place the crystal again on the opposite base and use the plank to reach the second ray. Aim it at the base of the wall behind the zip line.
Now you can access the chest containing Camping Gear, remove the crystal next to the barrier, and place it on the base at the back right, which activates the shortcut bridge. We’re not done exploring yet. Remember when we opened the Door of Deep Sorrows in the Crossroads? That will be our next destination.
Head towards the northeast exit, but don’t go just yet. In the plaza with the specters, there are at least two merchants. One sells the memory The Bath is Over There, while the other offers the memory Puzzle of the Veil Explorers. Now you can finally proceed through the northeast exit, the only one remaining undiscovered on the map. You’ll descend some stairs into an area filled with enemies. Deal with them, destroy the corruption cyst, and continue until you see the entrance to a cave with a gate at the back.
You will encounter infinite enemies (the mages with a blue barrier bar), so don’t waste time with them beyond the Minions of Rathera. Climb the left ladder and move straight ahead to find a whorl (the floating blue orb) that you need to carry to the altar next to the gate. This will enable you to eliminate General Rathera, who spawns the enemies. In the area, you will also locate the memory The Tacit.
Continue south on the map to destroy a corruption cyst to open a door, reach a fast travel beacon, find a chest containing an Anti-Vano Parade Helmet, and activate the side quest The Heart of Corruption, of which you can complete the first part.
After finishing this mission, when you return to the lighthouse, you should notice another indicator above Lucanis (in our case, it was sufficient for him to be at level 3), which will activate Farewell. If that’s the case, complete it; if not, pay attention when you return to the lighthouse to do it as soon as possible.
Once you’ve wrapped up everything, you should have enough memories to upgrade the workshop to level 5. Be sure to do this before speaking with Neve to advance in the main quest at last. It seems we may have veered off the path a bit, haven’t we?

















Post Comment