Guide to the Citadelle des Morts easter egg in CoD Black Ops 6 Zombies: All steps
Complete Guide to the Citadelle des Morts Easter Egg in CoD Black Ops 6 Zombies: Step-by-Step Instructions
Citadelle des Morts is a map featured in the Zombies mode of Call of Duty: Black Ops 6. This map includes a main easter egg, a storyline that players can complete by following specific steps and objectives while fending off waves of undead. Completing this easter egg can be quite difficult without guidance, as many tasks are hidden or not entirely straightforward. This guide outlines all the steps needed to successfully finish the easter egg.
Step 1: Activate the Pack-a-Punch Machine and Speak to Krafft
The initial phase of this easter egg involves activating the Pack-a-Punch machine by completing some starting objectives. Here’s what you need to do:
- Follow the objective marker to the castle.
- Utilize the cannon to break down the main doors of the building.
- Proceed to the crypt area of the dungeon.
- Once there, shoot the locks on the container.
- Defeat the Doppelghast boss that appears and collect the Ethereal Blood Crystal from the ground.
After acquiring the Ethereal Blood Crystal, approach the reddish portal that appears and interact with it to insert the crystal and activate the Pack-a-Punch machine on the map.
Once the machine is activated, open the nearby door costing 2,000 essence, leading to the dungeon area. Behind the Quick Revive perk, you will find a locked wooden door (a cell door). Hold the interact button on this door to open a window slot and find the character Gabriel Krafft inside.
After conversing with Krafft, you can proceed to the next objective.
Step 2: Acquire the Elemental Swords
Next, you will need to craft four elemental swords available on this map. However, before you can do this, you must obtain a special item that only drops starting from round 10 of the game.
Ensure you advance to at least round 10. From this round onward, you may encounter a special type of zombie wearing a templar helmet.
Defeat this type of zombie to collect the golden item called “Seal.” Only this zombie type drops this loot, so keep an eye out for it among the others. You will need to defeat at least four of these zombies to gather a total of four seals (one for each sword).
Once you have the seals, head to the refectory and locate the knight statues there. To create each sword, interact with each statue that corresponds to a symbol or figure associated with each type of sword (you can do this in any order).
Obtain the Dragon Sword
To obtain this sword, interact with the statue in the refectory that has a dragon on his chest and take the sword from his hands. With the sword equipped, go to the lobby area. Ascend the stairs near the Juggernog perk and interact with the pedestal in front of the dragon-shaped statue to place the sword there.
The sword will ignite in flames, and three points will illuminate on a shield above the dragon’s head. These points indicate the three locations on the map where there are burning braziers you must visit. The braziers are always found in the same spots in each game, and you can visit them in any order:
- Brazier #1: located in the starting square, in one of the corners.
- Brazier #2: found near the starting square, on one of the side paths.
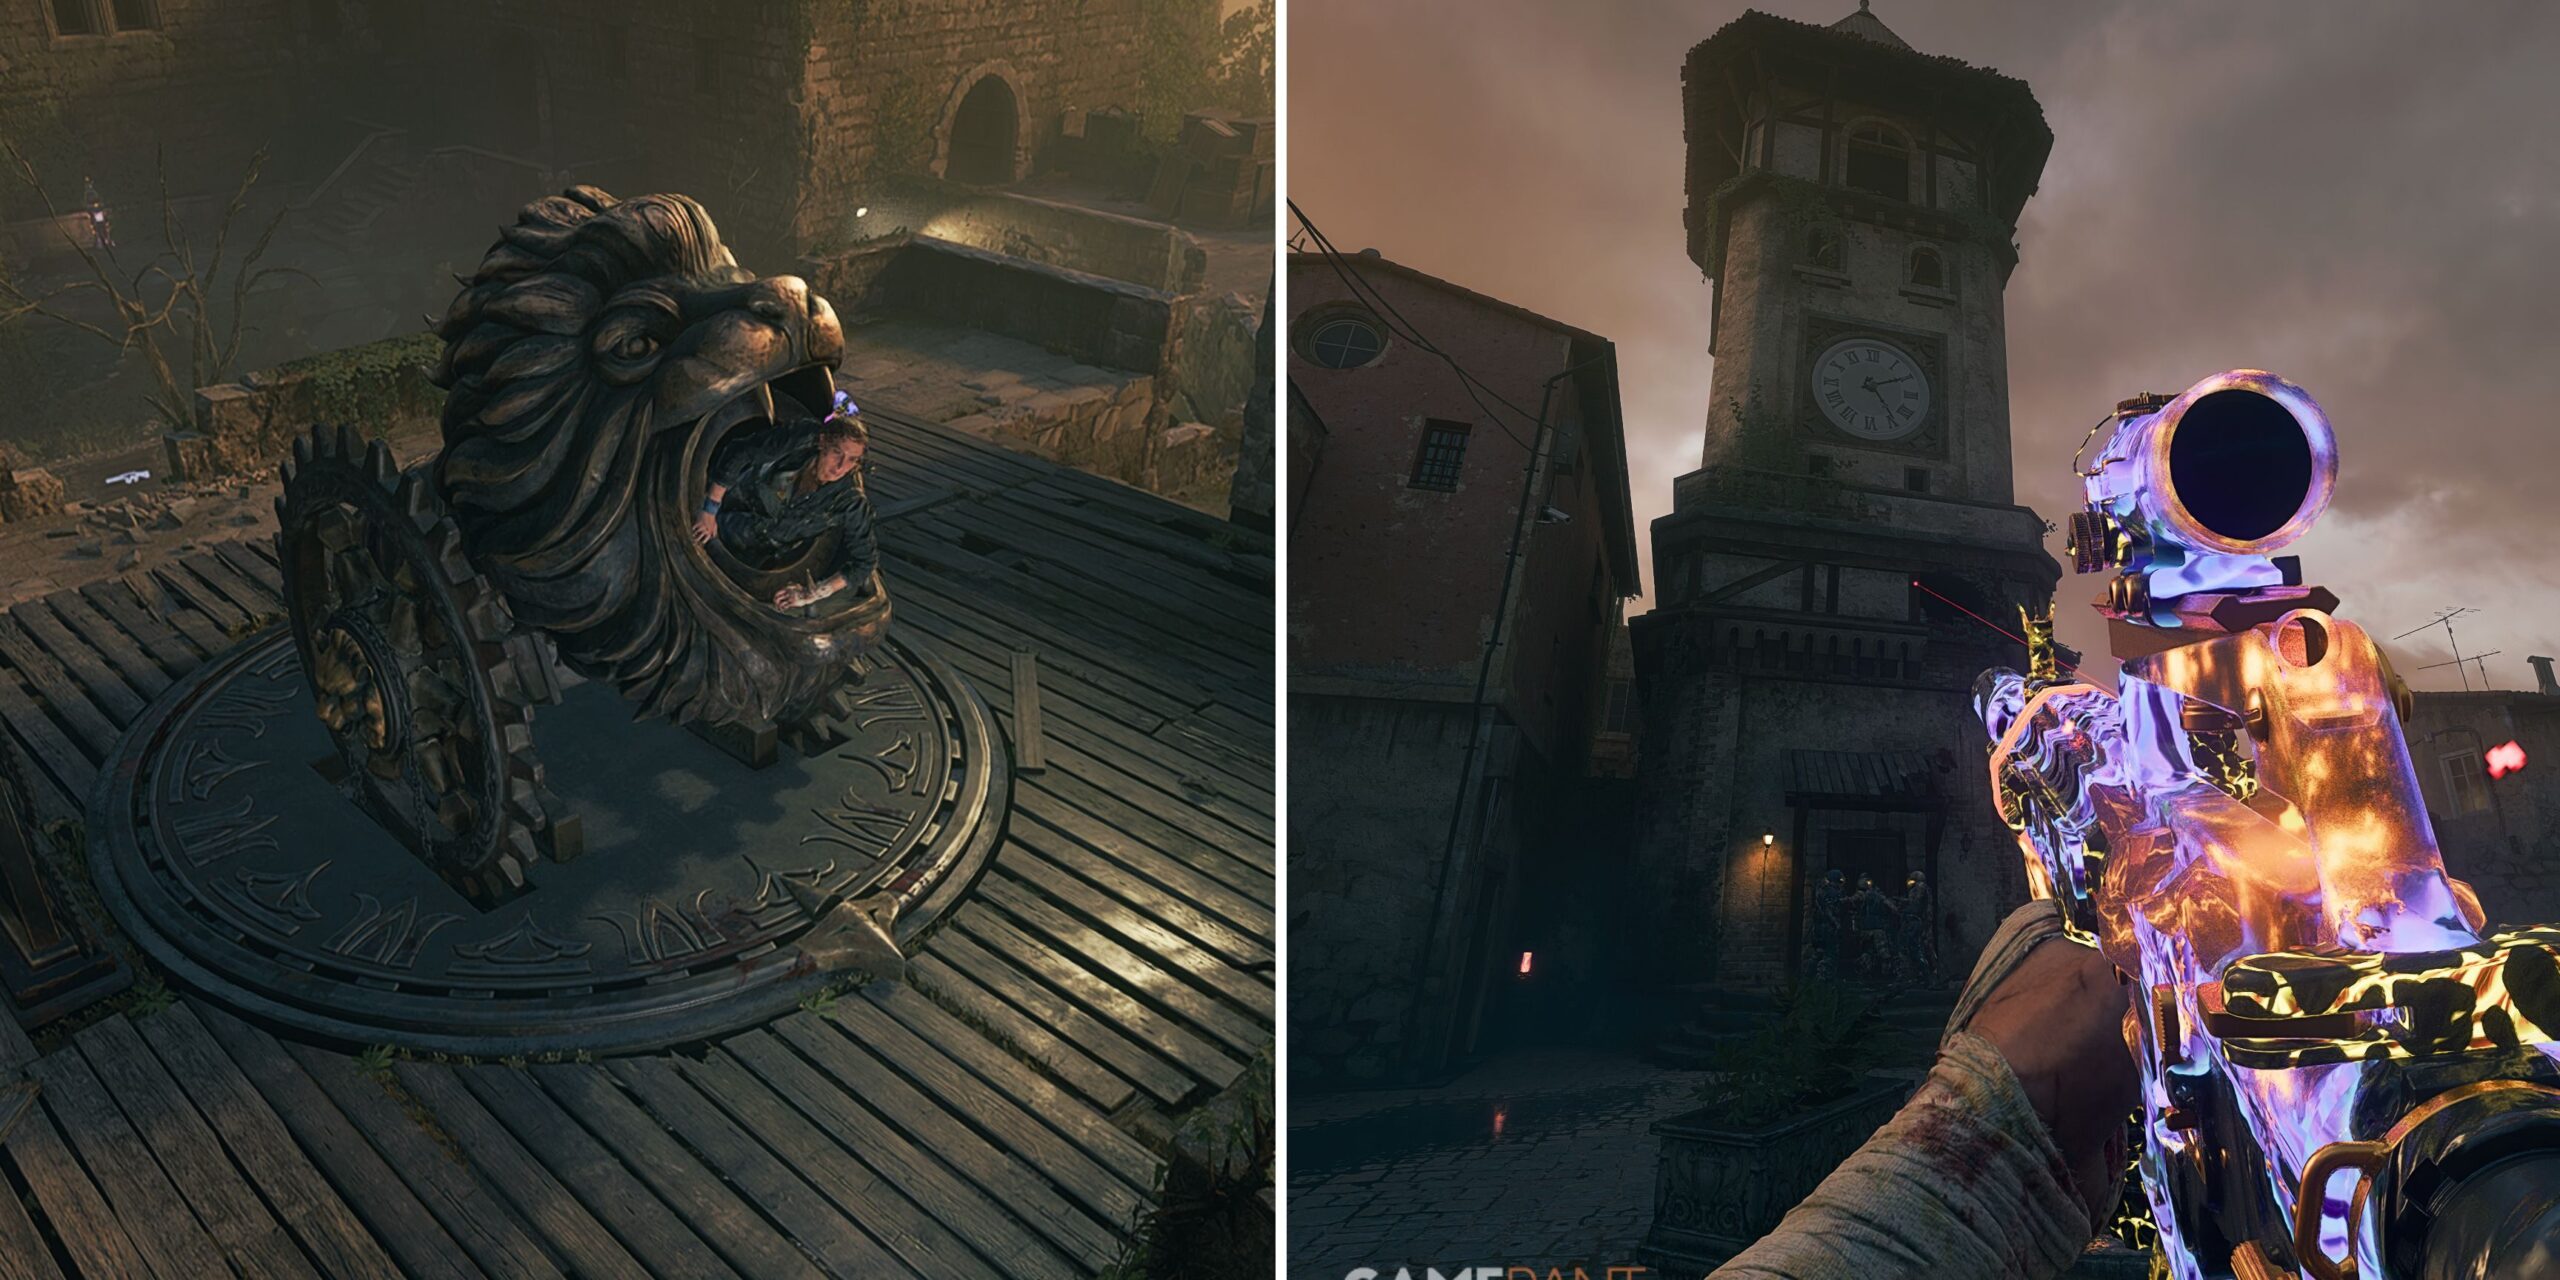
- Brazier #3: situated in the courtyard, on the high section of the wall next to the cannon.
As you approach these braziers, interact with them to collect the dragon fire in your hands. You must carry this fire quickly to the pedestal where you previously placed the sword. Be swift, as your health will diminish gradually (you can strike any zombies in your way to regain health).
After delivering the fire from the three braziers, you will be able to collect the Caliburn sword.
Obtain the Raven Sword
To acquire this sword, interact with the statue in the refectory that has a raven on his shoulder and take the sword from his hands. Next, head to the alchemy lab room located directly behind this statue. In this room, you need to search for a special antiquity that appears randomly in each game, either on tables or among the shelves.
This item may take the form of a raven skull, a fossil (similar to a rock), or an animal jaw, which you collect by pressing the interact button. Once you have it, go to the cellar of the tavern building in the square and place the antiquity on a circular panel on a wall, along with the sword in the slot.
- Now you will need to solve a puzzle based on zodiac signs by rotating and aligning two rings.
- The symbols appearing on the outer ring of the panel are zodiac signs (Virgo, Aquarius, Cancer, Sagittarius, etc.), meaning you must match the zodiac sign with the animal associated with the antiquity you collected.
- The symbols on the inner ring represent an astrological element (Fire, Water, Earth, and Air).
There are a total of twelve zodiac signs, resulting in 12 possible solutions depending on the antiquity you obtained in the game. For example, if you have collected bird skulls, this antiquity corresponds to the Gemini symbol, which is an Air sign.
Generally, it is not difficult to deduce which zodiac sign each antiquity belongs to. If you find a fish, its sign is Pisces (Water). If you get a horn, it’s Aries (Air). If you pick up a jaw, it’s Leo (Fire), and so on. Once you’ve determined the zodiac sign, linking it to its element is straightforward.
After finishing the puzzle, a purple portal will appear on the tavern floor, and orbs will float out from the puzzle wall. You need to ensure these orbs follow you until they are absorbed by the portal. When the portal absorbs enough orbs, it will change position. Repeat this step a total of three times until an orb returns to the puzzle position.
Once this is completed, you can interact with the Balmung sword, which will be fully charged with energy.
Obtain the Lion Sword
To get this sword, interact with the statue in the refectory that has a lion on his chest and take the sword from his hands. You will notice that golden Parasites (flying enemies) will appear around you. Ignore them for now and head to the courtyard and the upper area of the village. Near the Quick Revive machine, descend a slope to find a locked door with the lion symbol.
Your task here is to hit the glowing Parasites with the sword to imbue the weapon’s blade with the same glow. Then strike the lion symbol on the door until a yellow sign appears. Repeat this process until four signs appear on the door, then interact with it to open it and access an underground passage.
At the end of this passage, you will find a pedestal where you can place the sword. Do this, and four yellow signs will float around that you saw earlier on the door. You will now need to solve a small puzzle:
- Look closely at the activated pedestal; you will see one of the four signs glowing.
- You need to shoot each time at the floating sign that lights up on the pedestal under the sword.
- You must shoot a total of four signs in the same order indicated by the pedestal itself.
- Don’t forget to do it quickly, as you have a time limit to complete the puzzle (if you fail, you can skip a round and try again).
After completing this correctly, you will be able to collect the Solais sword for your inventory.
Obtain the Stag Sword
To get this sword, interact with the statue in the refectory that has a stag on his chest and take the sword from his hands. Now you need to collect three lightning rods scattered across the map.
The good news is that these lightning rods are always found in the same locations, which are as follows:
- Lightning Rod #1: located at the top of the hill, right next to the Deadly Daiquiri machine, it’s easy to find.
- Lightning Rod #2: to obtain it, install the Dead Wire ammunition mod on your weapon. After that, go to the courtyard area near the Quick Revive machine and shoot the energy box next to the slope so that electricity rises to an antenna on the roof and hits the object.
- Lightning Rod #3: go to the dungeon area and talk to Krafft in his cell; then, with the sword equipped, kill zombies until an armored one randomly drops this item upon dying.
After collecting the three lightning rods, head to the bastions on the hillside, the upper part of the wall to the right of the cannon, and place them in a container that has three slots for each item. After doing this, the container will begin to spin and emit electricity.
While the storm is happening, your task is to kill zombies with the sword to imbue its blade with lightning. Once the sword is electrified, approach the container and hit it to charge it. Repeat this three times to fully charge the container. Then, insert the sword into the container, and you will be able to retrieve the Durandarte sword.


















Post Comment