Nihil interior at 100% in The Legend of Zelda: Echoes of Wisdom
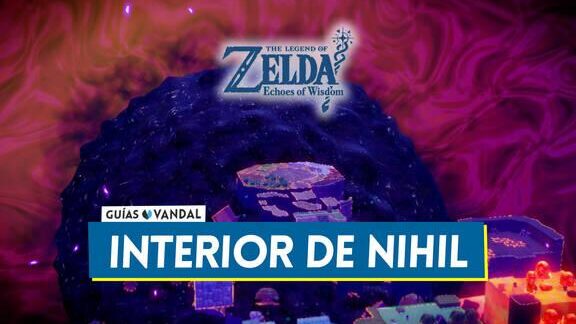
The Interior of Nihil, situated in the Void region of the Arcane Ruins, serves as the eighth and final dungeon in The Legend of Zelda: Echoes of Wisdom. This guide will walk you through the steps to achieve a complete run of this dungeon, tackling various puzzles, rooms, bosses, and ensuring you uncover all hidden secrets and treasure chests.
Completing the Interior of Nihil
While the Interior of Nihil follows the typical dungeon format, it is notably shorter than its predecessors and does not feature a map or collectible treasure chests. Additionally, you will have the constant support of Link for most of your adventure.
Start by following Link into a room where you’ll face a series of waves of dark enemies. Remember, you can only use replicas of monsters with your scepter, but fortunately, Link will assist you with his own weapons.
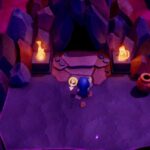
After defeating the enemies, move on to the next room where you will temporarily part ways with Link. Go through the door on your right. In this new room, you’ll notice a closed door along with a purple orb to your right.
To proceed, use a floating tile or replicas of clouds to reach the platform on the right. From there, hit the orb to break it, which will unlock the door.
In the next chamber, you’ll face more dark enemies. Once they are defeated, continue and descend some stairs.
In the 2D section, move forward until you can drop onto a moving platform. When it reaches the left wall, use a replica of a hang glider to access the upper recess:
Continue to the left and jump on the air currents generated by the expeller orbs to cross to the other side. At the end, grab a replica of a keese and fly up using the air currents. When your flight ends, create more hang gliders to exit the room.
In the next area where you reunite with Link, you’ll need to assist him in climbing to a thick wall so he can cut through it with his sword. The solution is simple: throw a replica of a platform through the bars so Link can climb onto it and reach the wall.
Once Link presses the button, you can move forward together. All that’s left is to jump into a hole ahead to trigger the final boss battle of the story.
Boss Battle Against Nihil
The encounter with the boss Nihil is divided into three phases. Here’s a strategy for each phase:
First Phase
During the first phase, focus on attacking his arms to detach them from his body. While Link will gradually strike him, don’t hesitate to summon powerful monster replicas to aid in the fight.
Higher-level monster replicas are particularly effective here. Enemies like the flail guard, level 3 ferrus, level 3 sword moblin, or even the centaleon (which you may remember from the Arcane Forest) are highly recommended.
Once you manage to remove Nihil’s arms, you can attack his body. Afterward, he will hide within the arena walls and only attack with his arms. Continue to target his arms until he emerges from the walls, repeating the attack patterns (but be careful of the pools of darkness he creates around his arms and hands as the fight progresses).
Second Phase
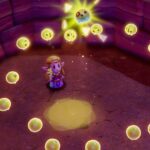
In the second phase, Nihil will try to escape to a 2D section filled with water, leaving Link behind. Here, you’ll need to dive quickly to the right, pursuing the boss and attacking his arms with aquatic monster replicas, like the squalonte or, preferably, the level 3 lizalfos.
Be mindful of Zelda’s oxygen during this phase (you can recover oxygen by passing through air bubbles) while avoiding tornadoes and enemies in the area.
Third Phase
Finally, in the third phase, which resembles the first, Link returns to your side, and you must keep tearing off Nihil’s arms to strike his body. The difference this time is that Nihil will have more arms than before and can temporarily transform into various bosses you’ve defeated earlier in the game.
Despite the changes, the dynamic remains the same. After sufficiently damaging his body, his piece of triforce will be exposed. At that moment, you’ll need to grab it with binding and pull back to tear it from his body, thus ending the battle.
Once the fight concludes, you can enjoy the closing credits of the story. The game is complete, but you can still load your last checkpoint from before this dungeon to further explore Hyrule and finish any remaining activities.
Related posts:
 Nihil and the ultimate power in The Legend of Zelda: Echoes of Wisdom
 Sudelia Ruins at 100% in The Legend of Zelda: Echoes of Wisdom
 Gerudo Crypt at 100% in The Legend of Zelda: Echoes of Wisdom
 Jabul Ruins at 100% in The Legend of Zelda: Echoes of Wisdom
 Temple of Eldin at 100% in The Legend of Zelda: Echoes of Wisdom
 Hyrule Castle at 100% in The Legend of Zelda: Echoes of Wisdom
 Temple of Lanayru at 100% in The Legend of Zelda: Echoes of Wisdom
 Temple of Farone at 100% in The Legend of Zelda: Echoes of Wisdom
 How many hours is The Legend of Zelda Echoes of Wisdom?
 The desert breach in The Legend of Zelda: Echoes of Wisdom
 After the fade-outs in The Legend of Zelda: Echoes of Wisdom
 The Lizalfos Burrow in The Legend of Zelda: Echoes of Wisdom


Post Comment