Temple of Eldin at 100% in The Legend of Zelda: Echoes of Wisdom
The Temple of Eldin, situated within the Eldin volcano, is one of the significant dungeons in The Legend of Zelda: Echoes of Wisdom. This dungeon becomes accessible during the mission titled The Volcano Gap. In this guide, we will explore how to complete the dungeon 100%, overcoming various puzzles, rooms, bosses, and ensuring you don’t miss any secrets or treasures.
How to Complete the Temple of Eldin
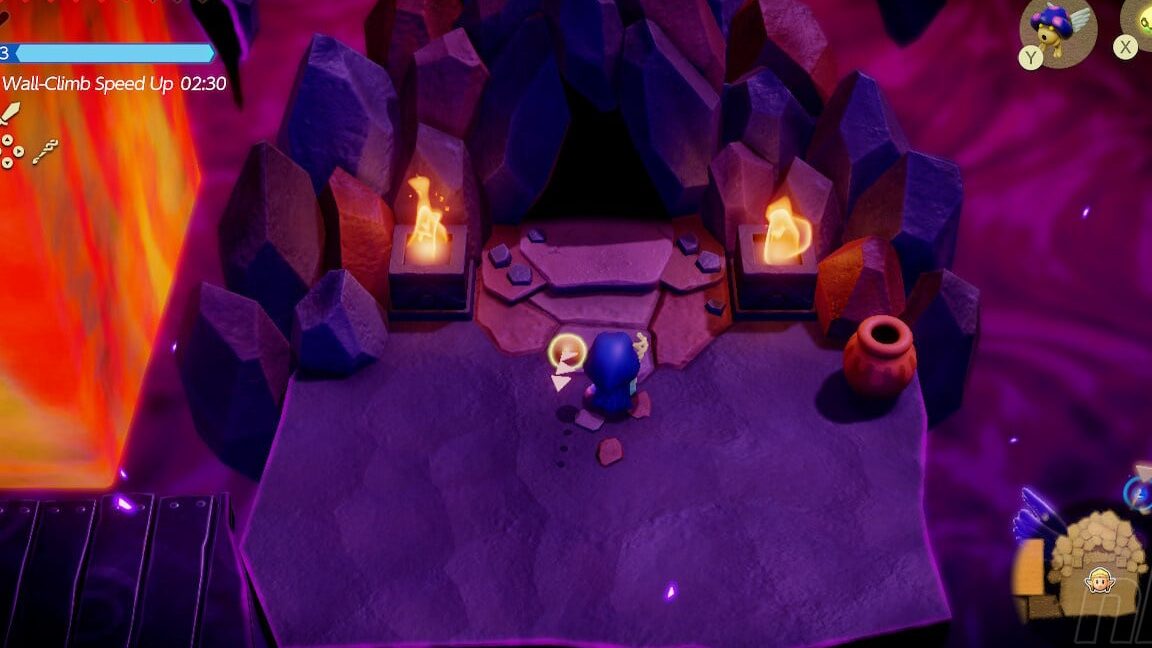
Your adventure begins as you enter the first room, where you will encounter two fire Kees and three doors (one of which is locked). First, head through the right door. In this room, create a couple of volcanic rocks to ascend to the upper door.
Inside, you’ll find a treasure chest that you can reach by propelling yourself from the air jets while grabbing onto a Keese. Inside the chest, you’ll discover a small key. Return to the previous room.
Before using the key, go through the upper door. Defeat the flying enemies that throw bombs and use bomb fish (or replicas of these flying monsters) to break the cracked blocks in the right corner. Beneath one of these blocks is a half-buried chest containing 8 spiral pumpkins.
Now, you can use the small key on the previously locked door. In this room, where lava rises and falls, wait for it to lower completely before pulling up a half-buried chest that contains a golden egg.
Next, move aside the volcanic rock on the left wall. You’ll discover a hidden button that opens the door leading further into the dungeon.
In the 2D passage, move to the right and descend the first ladder you encounter. Block the air jet with a rock to drop down another ladder. Here, head left first, where you’ll find a mechanism with an eye.
Place a volcanic rock in the lava to jump onto the stone wall, then leap onto the mechanism to activate it, which will open a previously locked door on the opposite side of the room. Proceed through this door to access a cave with a chest containing a small key.
Now, return to where you came from and climb the rocky wall with the two hot air currents. You’ll soon spot a chest high up that appears unreachable. However, there’s a trick to get to it…
Utilize the small slope next to the right ladder to stack three heavy rocks on top of each other. Once you have your makeshift tower, grab the bottom rock and push it towards the left air jets to block them. You’ll now be able to open the chest containing the dungeon map.
Next, return to the first room on the first floor of the dungeon. Use the small key to open the locked door and enter a room filled with cracked rocks, where you will encounter the mini-boss, Dark Link.
- In this battle, Dark Link uses bombs to attack.
- You can create a replica of the Kripín to distract him while it throws bombs.
- Approach him and use sword strikes or shoot arrows from a distance in sword mode.
- After dealing enough damage, he will summon mine-like enemies (if you attack him quickly, you can defeat him before they become a problem).
Keep in mind that many of the cracked blocks in the room may get destroyed during the fight. Don’t worry; some of them hide air jets that can help you reach elevated areas where Dark Link might move.
Once you defeat him, collect the power bombs that you can now use in sword mode. Move on to the next room.
In this room, first ascend the right staircase, then the left one. Continue up another staircase and from here, throw bombs at the cracked blocks to clear a path to another room.
This room contains a stone golem and many cracked blocks. Destroy all of them to find a chest containing 100 rupees and a hidden door behind the blocks on the right.
Pass through this door to face the fire summoner enemy. Use the bombs you obtained earlier to defeat him. After defeating him, open the chest that appears and receive a small key.
Return to the previous 2D room and to the left of the area with the cracked wall, destroy a purple barrier with your sword. Immediately break the cracked blocks below to uncover a hidden chest containing another small key (you now have two in your inventory).
Now, head left where you’ll see another cracked wall. Before doing anything else, go down the stairs to use one of your keys on the lock here. This will allow you to descend another staircase into a 2D room filled with stone walls. Move down the walls until you reach the chest with the big key to the boss.
Once you collect the big key, be prepared to quickly ascend as the lava begins to rise. Near the top, a section of stairs will break, and you’ll need to cross the gap by grabbing onto a Keese to fly across.
Once back in the upper passage where we originally skipped a wall of cracked blocks, destroy them and use the remaining small key on the lock above to access the second floor of the dungeon that leads to the boss door.
When you reach this area, you’ll need to use a Keese to jump on the air jets and avoid the lava below. A little further on, it’s advisable to launch a fire Keese from a distance to eliminate the pesky fire Octoroks that could knock you into the lava.
It’s especially crucial to defeat one that’s perched on a stone pillar, as this pillar will serve as a resting point to calculate your last jump. Before reaching the boss door, be mindful of the lava jets that rise and fall at irregular intervals; wait for the right moment to pass through without getting burned.
When you’re ready, open the boss door.
Boss Fight Against Volvagia
Volvagia is a fire dragon that looks formidable, but the battle is quite straightforward. If you have potions that provide fire resistance and equip the Frog Ring (to jump higher between platforms), the difficulty will reduce significantly.
Generally, Volvagia will fly around the arena without attacking until it burrows into the ground. Eventually, it will emerge from one of the lava holes at the edges of the arena. It will either launch fireballs at you or charge, shooting a large green energy ball from its mouth (easy to dodge as it moves slowly but beware—it tracks you for a while).
To damage Volvagia, we recommend creating a Kripín replica that will throw bombs while you switch to sword mode and also launch power bombs at it. This approach is preferable to shooting arrows or melee attacks, as close combat can be risky due to its headbutt attacks.
After repeating this strategy enough times, Volvagia will become enraged and enter phase two of the fight. However, the overall strategy remains the same. The only changes are that it will emerge from more holes and spit magma at the nearest platform.
Continue throwing bombs (if Volvagia is surrounded by lava, these will explode immediately upon contact), and you will eventually defeat it without much hassle.
Upon defeating the enemy, you will level up and gain another power triangle. You’ll also receive 5 pieces of power and the legacy of Din. Lastly, don’t forget to collect the new heart container before leaving the dungeon.
Related posts:
 Should you do the Eldin, Faron or Lanayru Temple first in Zelda Echoes of Wisdom?
 Zelda Echoes of Wisdom Eldin Temple walkthrough
 Zelda Echoes of Wisdom Lanayru Temple walkthrough
 Zelda Echoes of Wisdom Faron Temple walkthrough
 Sudelia Ruins at 100% in The Legend of Zelda: Echoes of Wisdom
 Gerudo Crypt at 100% in The Legend of Zelda: Echoes of Wisdom
 Jabul Ruins at 100% in The Legend of Zelda: Echoes of Wisdom
 Frequently Asked Questions in The Legend of Zelda: Echoes of Wisdom
 The mystery of the breaches in The Legend of Zelda: Echoes of Wisdom
 Escape from Hyrule Castle in The Legend of Zelda: Echoes of Wisdom
 The cave gap in The Legend of Zelda: Echoes of Wisdom
 Chaos in Zora Bay in The Legend of Zelda: Echoes of Wisdom


Post Comment