Temple of Lanayru at 100% in The Legend of Zelda: Echoes of Wisdom
The Temple of Lanayru, perched atop the Hebra Mountains in the Sacred Lanayru Mountain, is one of the most intricate dungeons in The Legend of Zelda: Echoes of Wisdom. This guide will help you navigate through every puzzle, room, and boss, ensuring you complete the dungeon at 100% without missing any secrets or chests.
How to Complete the Temple of Lanayru
The Temple of Lanayru stands out as the most challenging dungeon in your journey so far. Prepare yourself for an array of puzzles and obstacles as you delve into its depths.
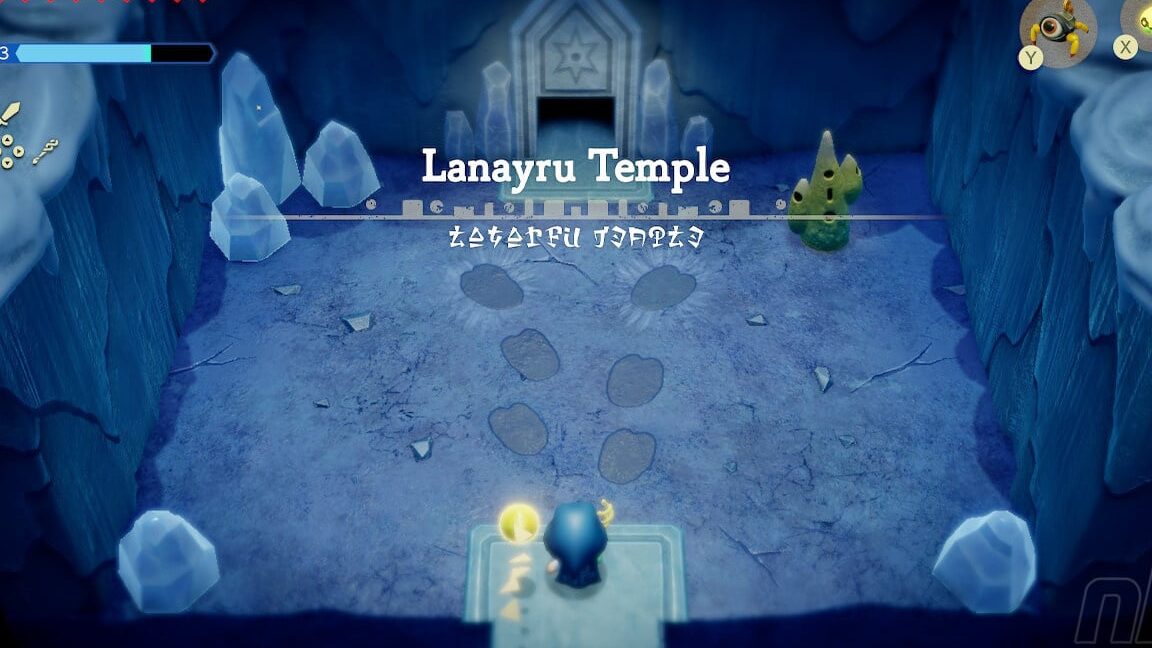
Start by entering the first room, where you’ll notice a fan on the wall. Head through the left door first to defeat two ice octoroks and unlock a chest containing five halite stones. Once done, return to the adjacent room and proceed through the right door.
Create two cloud platforms above the water and use binding to grab the fire orb. Carry it across the clouds to the pedestal on the opposite side to activate the central room’s fan, revealing a staircase.
Climb the stairs to find yourself in a cave. As you progress, you’ll spot a chest tucked away in a high nook, blocked by two streams of frozen air. Place a replica of a plataplof beneath it to reach the chest, which contains three monster fangs.
Continue until you enter a room on the first basement, where there’s another fan and a locked door to your right. Check the left room for a fire orb hidden behind bars. Construct a heavy rock behind the bars and push it into the frozen air stream to block it.
Once blocked, move the fire orb to the other pedestal to activate the previous fan and **thaw the water** where you’ll find a small key.
Retrieve the small key from the water and return to the room with the orb. Allow the orb to touch the icy air intentionally so it can freeze. Place it back on the pedestal to make the fan freeze the water again.
This will allow you to access the locked door on a ledge above. Stack three heavy rocks to block the hot air current and use another rock to reach the door.
Behind this door lies a cave with rocky walls and constantly falling stalactites. Unfortunately, icy air currents will try to throw you into the abyss. Use the binding ability to manipulate the stalactites to block the icy winds as you make your way through.
After exiting the cave, you’ll find yourself in a corridor with more icy winds. Wait for the first two currents to stop before crossing with a cloud. Use a plataplof replica to reach a high nook on the left, where you’ll find a chest containing a golden egg.
Return to the corridor and use another plataplof combined with clouds to reach the door on the right. Inside, you’ll find a room divided by a sturdy ice wall and a locked door on your side.
While it may seem like there are no paths forward, there is one hidden route. Use binding to move the ice block next to the braziers to discover some hidden stairs leading down to a cave.
This cave features several climbable rock walls. Start by descending to the lowest ledge on the left, stacking three heavy rocks to create “steps” for yourself to jump up to the higher stone wall.
Now descend to the back of the room and use binding to grab the fire orb. You’ll need to climb up without letting it freeze from the cold gusts. The rocks you placed earlier will help shield you from the icy winds. When you place the orb on the upper pedestal, it will activate the previously mentioned fan, thawing the ice wall.
Ascend back and enter the right door. In this room, you’ll find two buttons to press, but you can’t push them in the usual manner. Instead, you must press both buttons simultaneously.
To achieve this, push the frozen block you see immediately upon entering the room to the right. As the block slides toward the right button, position yourself to stand on the left button. Time it right, and you’ll succeed in pressing both buttons at once.
This will cause a chest to appear containing a small key. Use the key to open the door on the other side, leading you into a large chamber filled with golem enemies that you must defeat. Once defeated, a chest containing the dungeon map will appear.
Proceed to a small room with a teleportation pad. Heal yourself fully and continue to the next area, where you will face a mini-boss resembling a larger Zol.
At the start of the encounter, this enemy appears invulnerable to your attacks due to the protection of its helmet. In this first phase, you’ll notice that its helmet is covered in ice crystals. If you can break these crystals, you’ll be able to inflict damage.
- To destroy the ice crystals, use replicas of fire monsters such as fire keese, fire zol, or ice invocantis. You should have a good selection of these by now.
- When you manage to freeze it, you can attack it normally, preferably with sword strikes or bombs.
- After dealing enough damage, the mini-boss will split into smaller parts, much like a matryoshka doll.
- Continue using the same strategy of freezing and attacking until you defeat all parts of the mini-boss.
After defeating the mini-boss, descend into a large 2D cave. Here, you must locate and light four extinguished braziers to open a door. For orientation, consider that the braziers are located in the corners of the cave.
The method for igniting each brazier is as follows:
- Upper left brazier: This one is easy; it’s behind a frozen crystal that you can melt with fire.
- Upper right brazier: It’s in a high nook that you can reach by stacking objects underneath you.
- Lower right brazier: From the top of the nearby stairs, you can launch a flaming zol when no stalactites are falling to ignite it.
- Lower left brazier: To light this brazier, throw a fire keese into the upper nook without letting it rise too high to touch the wind gust. Then, aim at the brazier to have the keese ignite it.
Once all the braziers are lit, proceed to the newly opened door. Before descending, climb to the top using replicas of hanging spiders to find a chest containing 100 rupees.
Now you will reach basement 3. Here, you’ll need to solve a significant puzzle involving a yellow button and the chest with the large key.
First, you’ll find yourself in the room containing the large key chest, located behind bars next to a yellow button. Pressing this button will roll a nearby snowball, but it will break upon hitting the frozen crystals. At this moment, it won’t serve any purpose.
Head through the lower door, which is south of the chest. Cross a small room with a frozen orb and an extinguished brazier beside a fan. We will return to this area later. For now, proceed to the next room with water and enemies, where you’ll find a chest containing three spiral pumpkins.
Next, continue through the southern door. You’ll go through a corridor with a fan and a locked door, as well as a section of frozen water. Move towards the only available door at the moment, which is on the right. Here, you’ll pass through another small room with frozen water and arrive at a large cavern-like area with a fire orb and some frozen ground, along with enemies.
You’ll need to grab the orb and carefully navigate across the frozen ground while avoiding the enemies until you reach a pedestal on the other side. If it proves too difficult, you can first clear the cavern by defeating all the monsters. When you place the orb on the pedestal, the last fan you saw in the previous corridor will activate, melting the sections of frozen water in the two rooms leading back to the cavern.
Now, return to the small area you passed through earlier and dive into the water to the right, where you’ll encounter level 2 Tektites and barriers near a chest. You can place a wooden object in the water to climb onto it and bypass the last barrier to reach the chest containing a monster stone.
Now, head back to the fan corridor and enter the water to use binding to grab a heavy rock and drop it on the button at the back, which will open the left door.
Enter this new room, where you’ll find water and two switches that need to be pressed at the same time. Unfortunately, you won’t be able to do this yet, so pass through the next open doorway. You’ll arrive at a dead-end corridor where behind a barrier is a fire orb along with two hot air currents and one cold current.
Use heavy rocks to block the hot currents and maneuver the orb in front of the cold current to freeze it. Place it on the pedestal to freeze the water in the room on the right you just came from.
Return to that room and create a replica of a cold block that you can push onto the right button while you quickly jump onto the other switch to press them both simultaneously.
Once the door opens, you’ll enter a room where you’ll have to fight a white Wolfos along with other regular wolfos. Defeat them all to continue to the final room on this floor.
This last room features a pool of water in the center. In the upper left corner, there’s a fire orb that you need to carry to the pedestal in the lower right corner. Be wary of the several holes with cold air currents and freezard enemies along the way.
Fortunately, you can easily block the air currents by pushing cold blocks and eliminate the monsters before proceeding to carry the orb safely. Once the area is clear, simply use binding to move the orb across the room.
When you place this final orb in its spot, it will activate the fan in the first room south of the large key chest. This will melt the ice wall you may have forgotten about. Enter that room and light the brazier. Then, convert the ice orb back into a fire orb and place it on the pedestal to activate a fan that will melt the frozen crystals blocking the snowball from reaching the yellow button.
Before heading to press the yellow button, reactivate the fan using the ice orb this time to freeze the water where the snowball needs to roll.
Finally, after completing all these tasks, you can open the chest containing the large key. Before descending into the right door that leads to basement 4, you can climb into a small duct above this door to find 50 hidden rupees. When you’re ready, descend and open the boss door.
Combat Against the Boss Geligneo
It’s time to face the boss, who has a few tricks up his sleeve. Initially, none of your attacks will harm him due to the protection provided by his helmet. In the first phase of the battle, you’ll notice that his helmet is adorned with ice crystals. If you can break these crystals, you’ll be able to inflict damage.
The only way to destroy these ice crystals is by using replicas of fire monsters. For example, a fire keese, a flaming zol, or any fire invocantis. If you’ve been following this guide, you should have encountered these creatures in the Eldin region.
Additionally, if you find yourself lacking fire monsters, the replica of the brazier can also be useful for melting the ice crystals on Geligneo’s helmet (though this method is trickier).
Once you manage to break the ice crystals, his body will be exposed (but not stunned, so be cautious of his attacks). This is your opportunity to attack quickly using the sword.
After dealing enough damage, Geligneo will become enraged and enter the second phase, where his helmet will ignite with flames. Now, you need to do the opposite of what you did before; you must extinguish the flames on his helmet using replicas of ice monsters (like a ice keese or ice invocantis).
Once you extinguish the flames, the dynamic repeats. His body becomes exposed, allowing you to attack him with sword strikes, arrows, bombs, and other monsters. This continues until you reach the third phase of the battle, where Geligneo will mix his previous movements, and his helmet will alternate between fire and ice.
Depending on the element his helmet is currently using, you’ll know which type of monster to attack him with. Just continue following the strategy outlined, and you’ll eventually defeat him without much trouble.
After the battle, you’ll gain five pieces of power, Tri will level up, and this time you’ll obtain the Legacy of Nayru. Don’t forget to collect a new heart container before leaving the dungeon.
Related posts:
 Should you do the Eldin, Faron or Lanayru Temple first in Zelda Echoes of Wisdom?
 Zelda Echoes of Wisdom Lanayru Temple walkthrough
 The Lanayru Gap in The Legend of Zelda: Echoes of Wisdom
 Temple of Eldin at 100% in The Legend of Zelda: Echoes of Wisdom
 Zelda Echoes of Wisdom Eldin Temple walkthrough
 Zelda Echoes of Wisdom Faron Temple walkthrough
 Sudelia Ruins at 100% in The Legend of Zelda: Echoes of Wisdom
 Gerudo Crypt at 100% in The Legend of Zelda: Echoes of Wisdom
 Jabul Ruins at 100% in The Legend of Zelda: Echoes of Wisdom
 Hyrule Castle at 100% in The Legend of Zelda: Echoes of Wisdom
 How many hours is The Legend of Zelda Echoes of Wisdom?
 The desert breach in The Legend of Zelda: Echoes of Wisdom


Post Comment