The Lanayru Gap in The Legend of Zelda: Echoes of Wisdom
The Lanayru Gap is one of the main quests in The Legend of Zelda: Echoes of Wisdom and is closely tied to the mission Goddess Gaps. This quest will activate in your journal once you reach Mount Hebra, located north of Hyrule Castle after completing the dungeon at Hyrule Castle. In this guide, we will show you the objectives and how to complete them so you won’t get stuck.
How to Complete the Lanayru Gap Mission
To complete this mission, you need to ascend to the Sacred Mount Lanayru. Start by heading to the highest point of Mount Hebra, the region north of Hyrule Castle.
How to Ascend Mount Hebra
Although the mission won’t be registered in your journal yet, you must reach Mount Hebra to proceed. Begin by traveling along the path to the right of the Arcane Forest until you find a blocked cave entrance with a cracked stone.
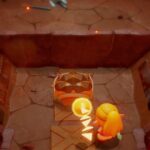
Use a bomb fish to break the stone, and once inside the cave, find a way to grab onto the rocky ceiling. The easiest way to climb is by creating a replica of a platform (which you should have in your replica encyclopedia; if not, stack other objects).
Once you’re climbing, head to the right and create a couple of stacked beds in the gap where you can place another bomb fish to blast the next cracked blocks. Place another bomb fish on the rising platform to break the blocks above and ride it up.
On the upper floor, head left where you’ll encounter a Peahat enemy near two climbable walls. Climb up and you’ll find a large rock next to more cracked blocks.
Use linking to move the rock to the right and break the blocks below. After that, clear the last block and push the rock as far left as possible.
Go back down and hop on the moving platform. Blast the blocks above with another bomb fish, allowing it to rise to the hole you’ve cleared. Finally, exit the cave to officially reach Mount Hebra.
Climbing Mount Hebra
This is where the real mission begins. As you start walking, you’ll be confronted by a freezing wind that will damage Zelda’s health if you don’t protect yourself. One way to keep warm is to create a replica of a brazier to carry with you using linking. You can also utilize heat-giving monsters like the Flame Zol.
However, carrying a brazier is not very practical for movement. It’s much better to prepare juice recipes that grant cold resistance, like Flame Juice or, even better, Flame Juice of Rocotata, which offers up to three minutes of cold resistance.
Once ready, venture into the forest and follow the only path until you hear a creature grunting. Investigate it; it’s Khond, who will invite you to follow him to his home. Do so and later take the shortcut with him.
Inside his home, you can warm up and wait for the blizzard to pass by snooping through his belongings. Once the blizzard ends, Khond will clear a pile of snow in front of a cave entrance. Go inside. In the first room of the cave, place a brazier replica next to the frozen crystals to melt them and find another door. Pass through to enter the next room.
Here, if you take the door on the right, you’ll find a chest with 50 rupees. However, you need to melt the ice blocks to the left to discover a hidden door.
Go through this door and melt the ice crystal on Khond’s left to reach the area where you can create the access portal to the void of the Mount Hebra cave.
Void of the Mount Hebra Cave
Your next task is to find 5 of Tri’s companions to close this gap. Here are their locations and how to reach them:
- Companions of Tri #1: From the start, go down and melt the frozen crystals until you reach a large one containing the group.
- Companions of Tri #2: Head left to a frozen ground area with a crystal in the center to melt, revealing this group.
- Companions of Tri #3: From the start, move up and right to jump onto the frozen ground platform; continue to find another group on a ledge.
- Companions of Tri #4: From the start, go directly up the snowy slope and then left. Place a replica platform between the trees and melt the upper ice crystal to find these companions.
- Companions of Tri #5: The last group is to the right of the previous one, on a platform with a dark enemy.
After closing the gap, return to the cave where Khond is, and he will head upwards.
Climbing to the Peak of Mount Hebra
Now, you need to head to the highest peak of the mountain. Pass through the next stairs to enter a 2D cave. Progress through here by melting the icy blocks with lit braziers and climb a stone wall until you reach the exit.
This will bring you to a high area of the mountain with a lake. From the teleport pillar, enter the water and go left to find an entrance to a new cave in the northwest corner of the lake. In the first room, be cautious of the floor blocks that will break under your weight. Stack objects to reach the door and move to the next room.
Inside, be aware of the air cannons. Simply cross the room to the other side, avoiding the currents that might knock you off. You can create object replicas to help you cross where there’s no air. Towards the end, you’ll need to jump over the air from an expelling orb to reach another door.
You’ll be trapped in a room with several icy blocks and two ice keese. Defeat them and thaw the block in the upper right corner to find a Zol hidden inside. Defeat it as well. Two doors will open: the left one leads to a chest, while the upper one will trap you in another room with two freezard enemies.
Defeat them and continue through two more rooms to the left until you climb a staircase. You’ll cross a 2D cave, climbing rocky walls while avoiding falling ice stalactites and later dodging ice octoroks that shoot at you.
When you arrive at the moving platform, create a heavy rock replica to shield yourself from the two blasts of freezing air during the ascent. Do the same on the next platform, and you’ll finally be able to exit to the outside.
You’ll find yourself at the highest point of Mount Hebra. Continue to the left, where you’ll soon see large snowballs rolling down the mountain. Avoid them until you reach a small climbable wall. Climb it and turn right to continue ascending up a slope. At the top, you’ll encounter Khond, but he will go even higher…
Keep climbing the slope in front of you. Remember, you can create a replica of a Flame Zol and hold it with linking to use as a shield against falling snowballs. It can withstand several hits before it dies and will help you clear the snowballs without taking damage.
A bit further up, enter a staircase leading to a 2D cave. Here, you simply need to climb while avoiding the falling snowballs. Again, using a Flame Zol as a shield is a good strategy.
Once you exit at the top, defeat the two comerok and walk towards the edge of the mountain. This is where you can create an access portal that leads to the void of Mount Hebra.
Void of Mount Hebra and Sacred Mount Lanayru
This area consists mainly of clouds and pesky enemies, although the path is linear. Proceed until you find a group of small clouds you can memorize with the scepter. They function similarly to a bed, allowing you to create “bridges” to reach certain areas, but they are even better since they float for a while without needing to be attached to other structures.
A little further, you’ll find a staircase leading down to a cave. Inside, you can practice using the clouds to cross from platform to platform to the right, towards walls you can climb that have ice blobs. While you can use other replicas for this purpose, like floating tiles, the clouds work well.
After exiting this last cave, you’ll finally be at the part of the void of the Sacred Mount Lanayru. Here, the path is once again linear and short. Head to the right and use the clouds to rise to the upper terrain. Then, make your way around the eastern platforms to ascend to another higher area, and finally, climb a rock wall to the entrance of the dungeon Temple of Lanayru.
After completing this dungeon, you will have closed the gap in this region and can continue with the next story missions you have pending.



















Post Comment